GEM-CAR FAQ
How to Deactivate a Bay
This procedure allows you to temporarily or permanently disable a specific bay according to your needs. Please follow the steps carefully to avoid any errors.
Make sure you have the necessary permissions before you begin. To grant or modify system permissions, see the FAQ: Modification/Creation of a Role to Be Assigned to Users
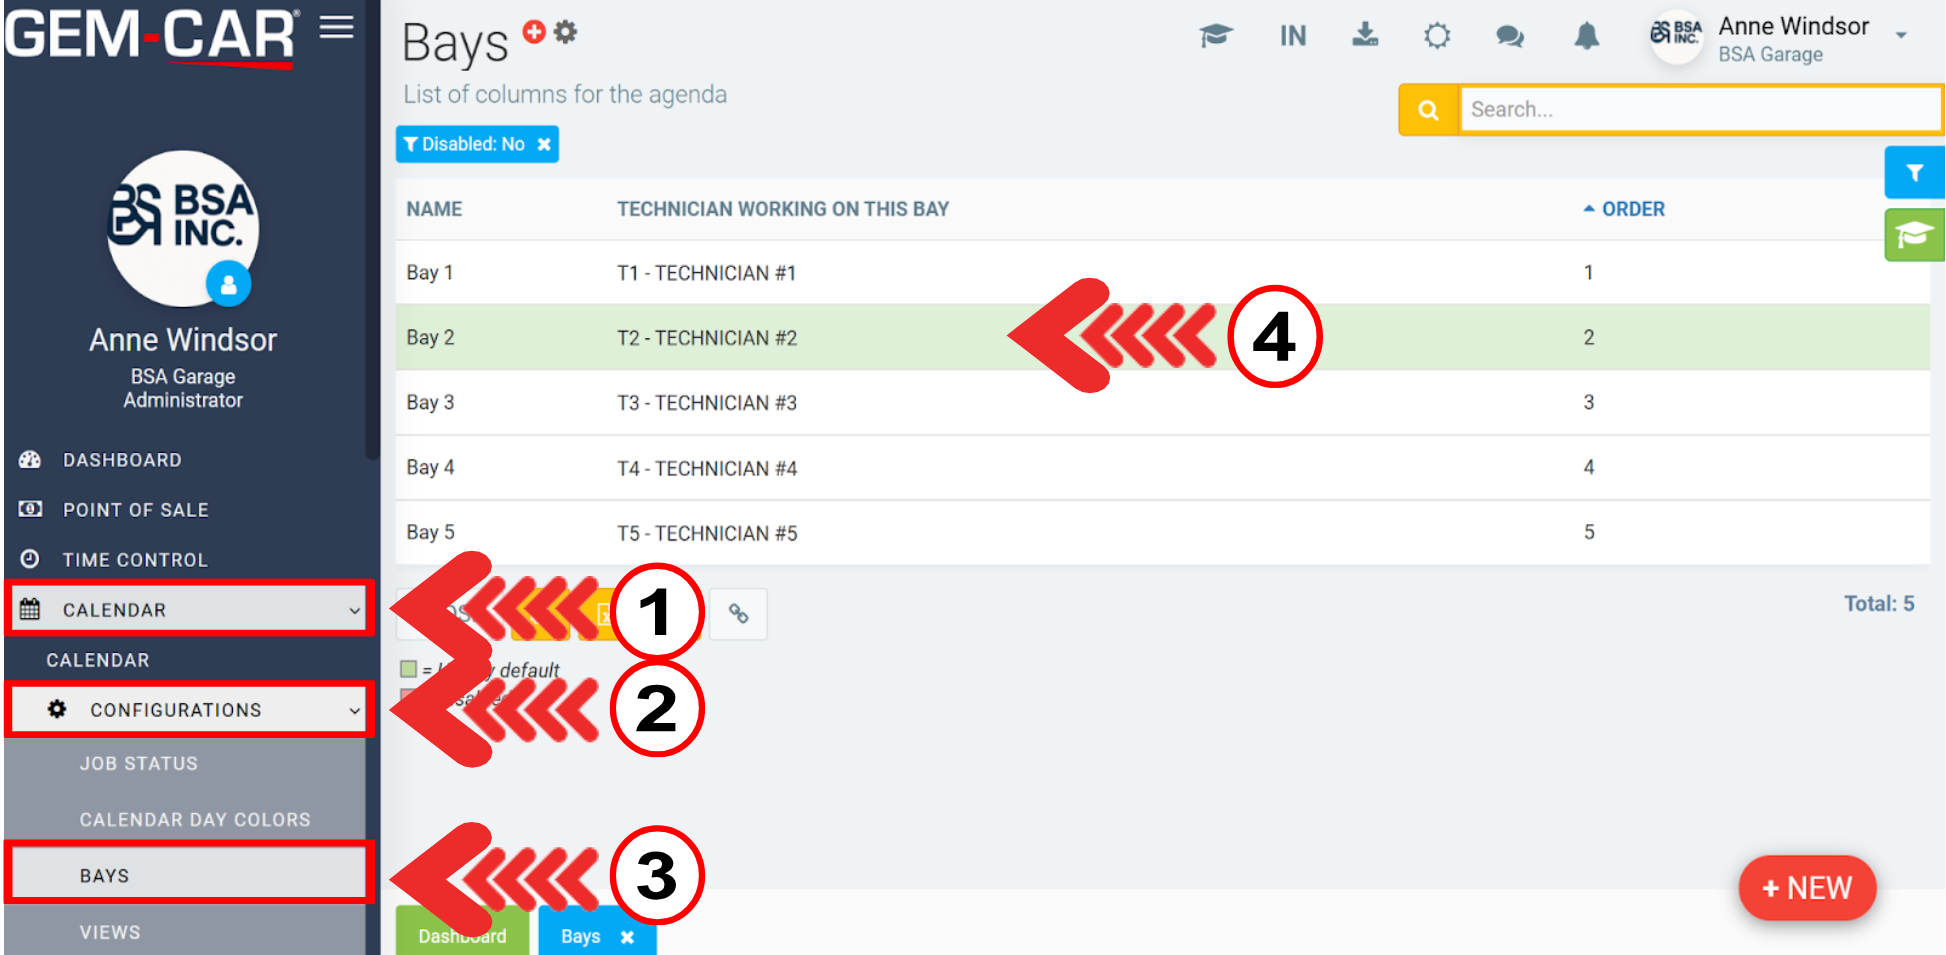
In the menu on the left, click Calendar > Configurations > Bays. Then select the bays you want to disable.
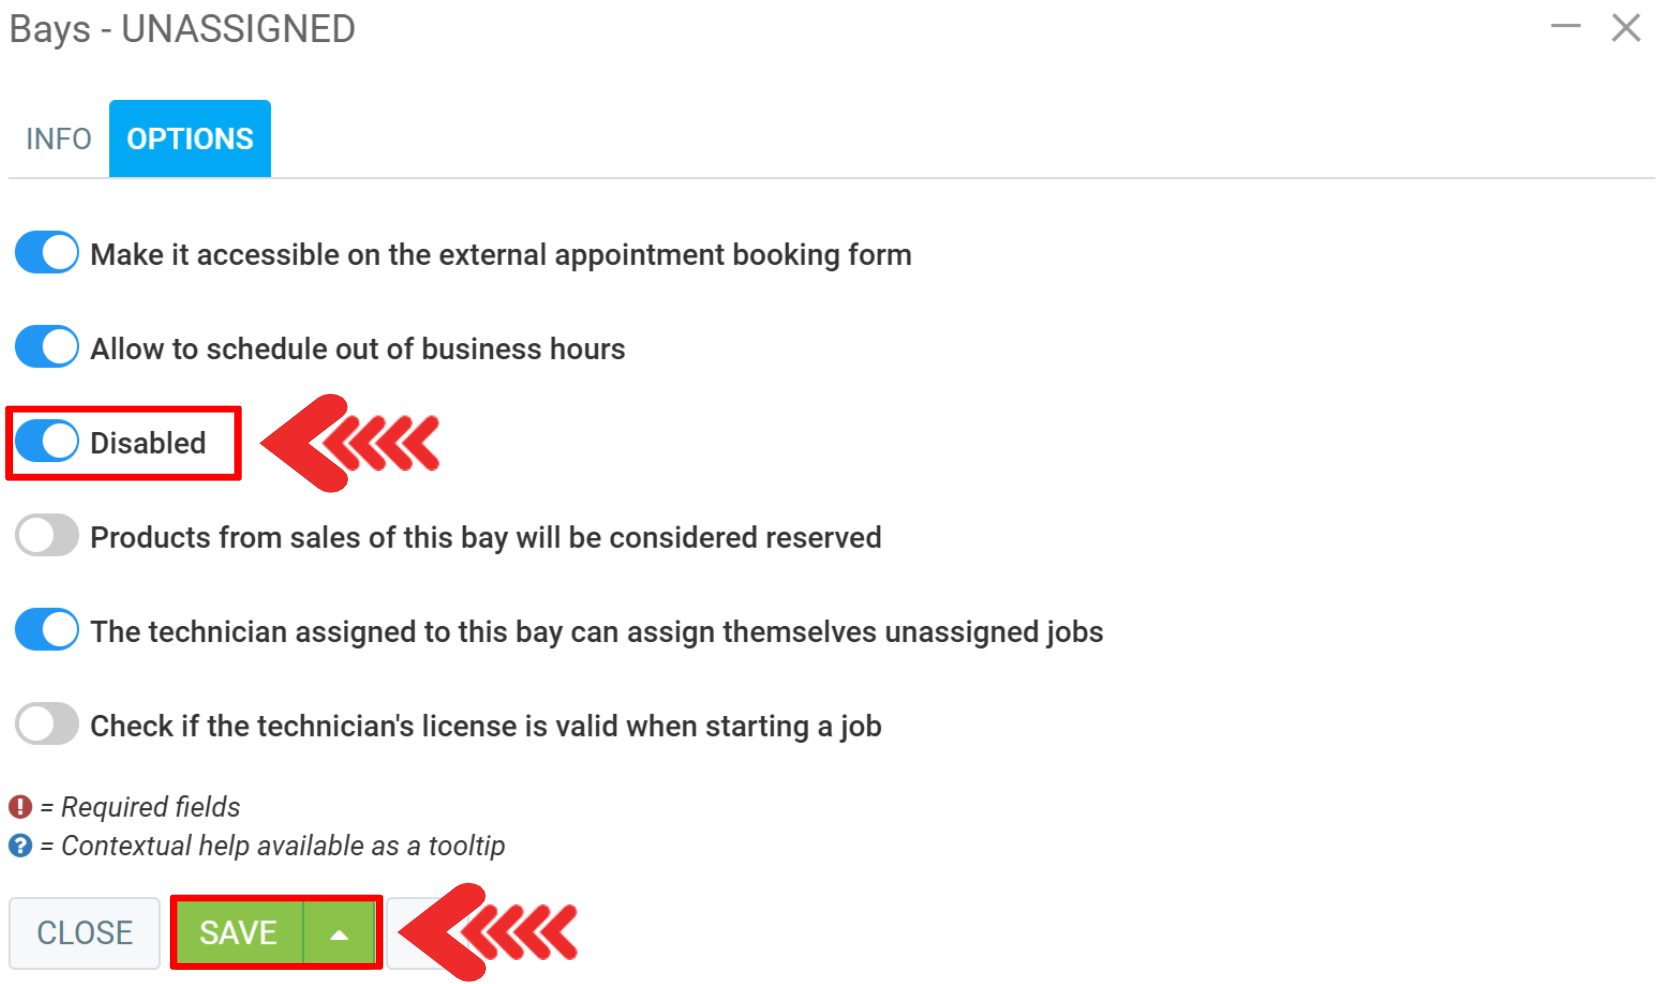
On the next page, click on the Options tab and select the Disabled option.

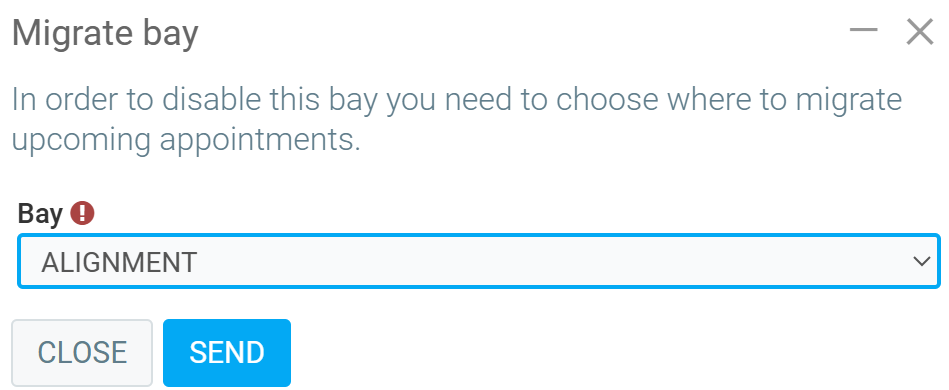
A new window will open asking you to select another bay to migrate the one you are disabling.
You will see a menu displaying all the bays in your system.
Click on the one that best suits your needs and press the blue Send button.
When you return to the Options tab, you will see that the Disabled option is checked.
Then click the green Save button at the bottom of the page.
The other option is to temporarily disable a bay via the display. You can also remove it so that it is no longer visible, but all future appointments will be retained.
Other articles on the subject:
Create or Modify the Day Colors in the Calendar
Configuring Necessary Bays to Schedule Appointments in the Calendar
View Upcoming Appointments in the Calendar
Change the Display and Position of Your Bays in the Calendar
Posted
4 months
ago
by
Bianca da Silveira De Amorim
#2544
158 views
Edited
4 months
ago